Welcome to our new site! Unfortunately your existing login won’t work anymore so please click here to re-register and continue contributing to the Marine Metre² project!

You can easily capture a 3D model of your Marine Metre² seashore survey site using your phone or tablet to do a photogrammetry survey.

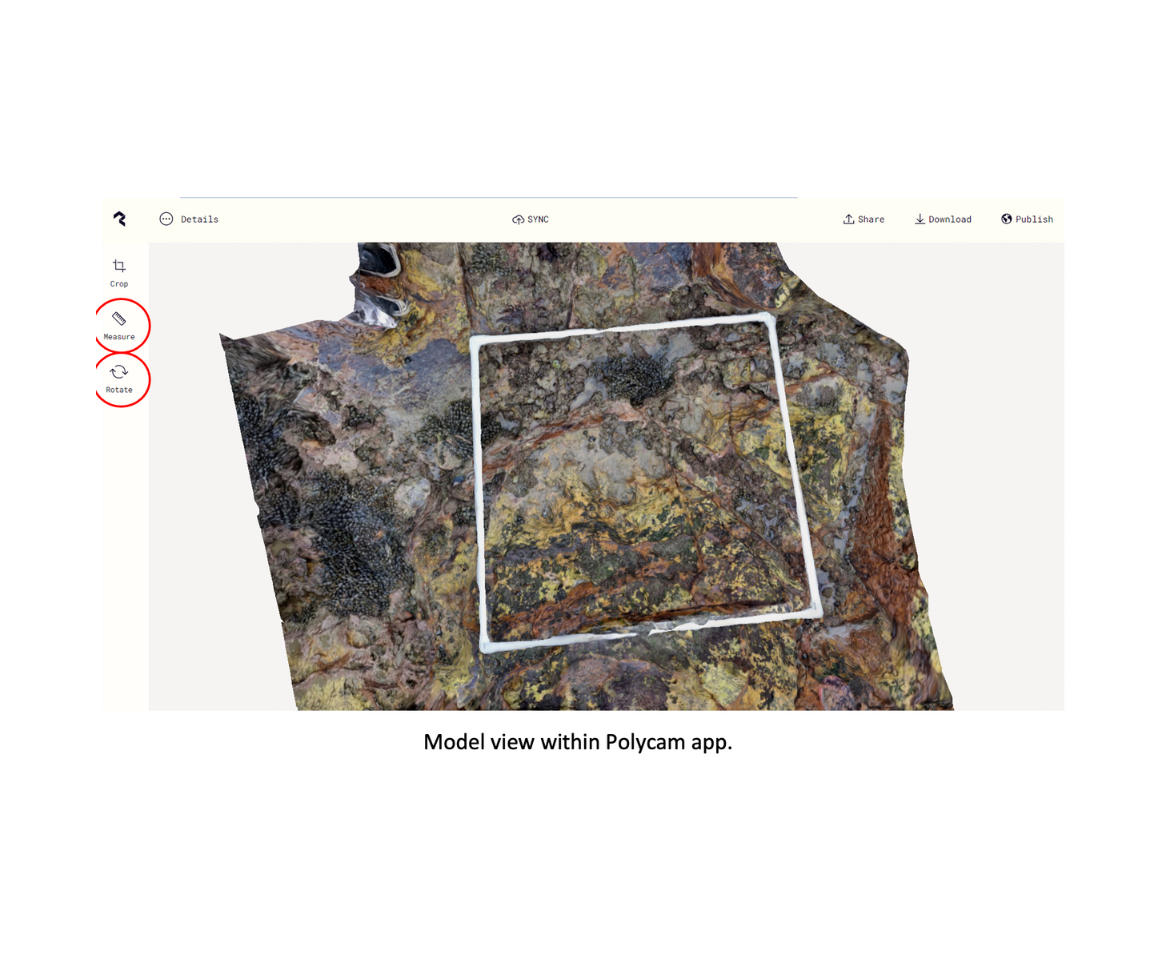
These models are a great way for you and others to understand and monitor changes happening within the environment. They provide a permanent visual record of the site, virtually transporting you back to explore your study site again and again. They are a great tool for showing others what your site looked like and enable you to ask new questions that may arise once you’re back in the classroom.

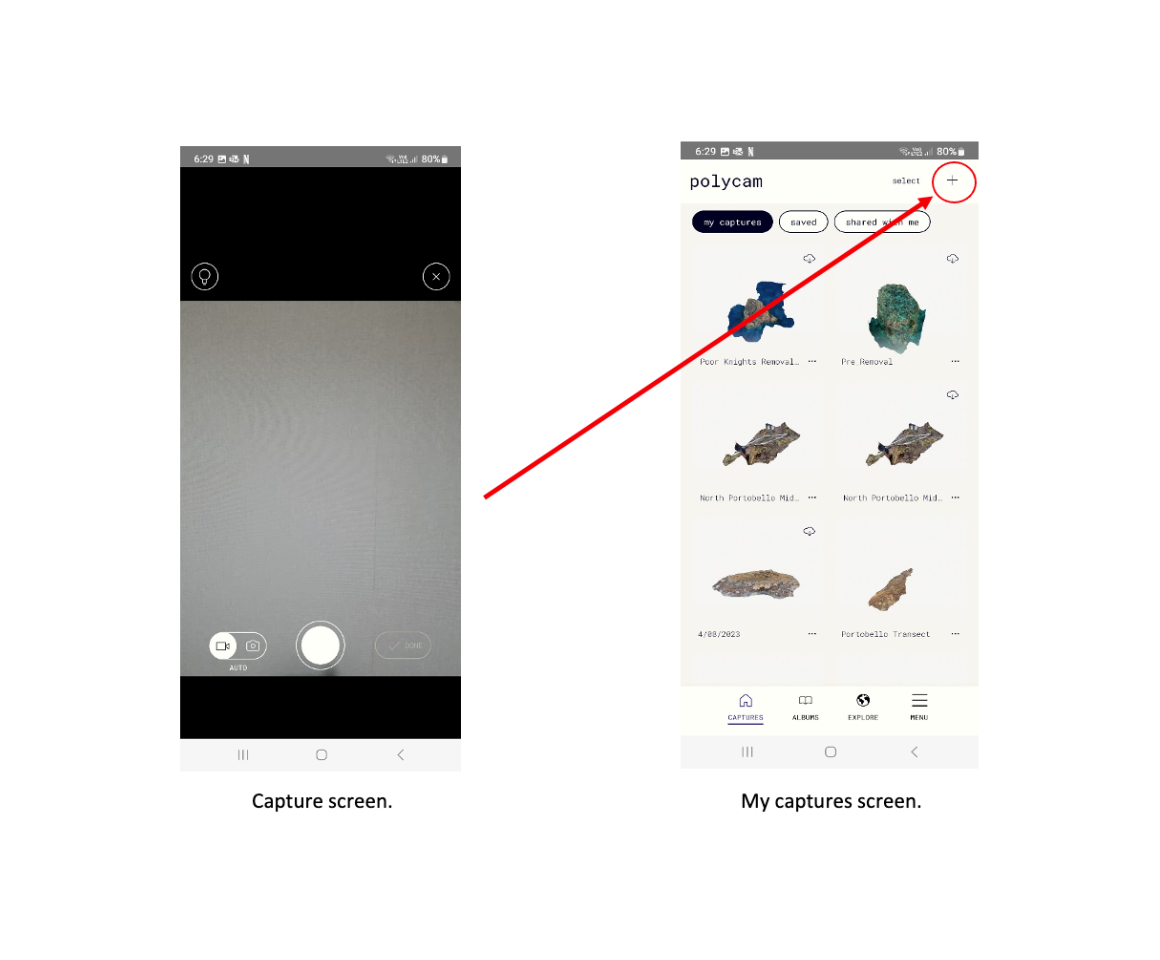
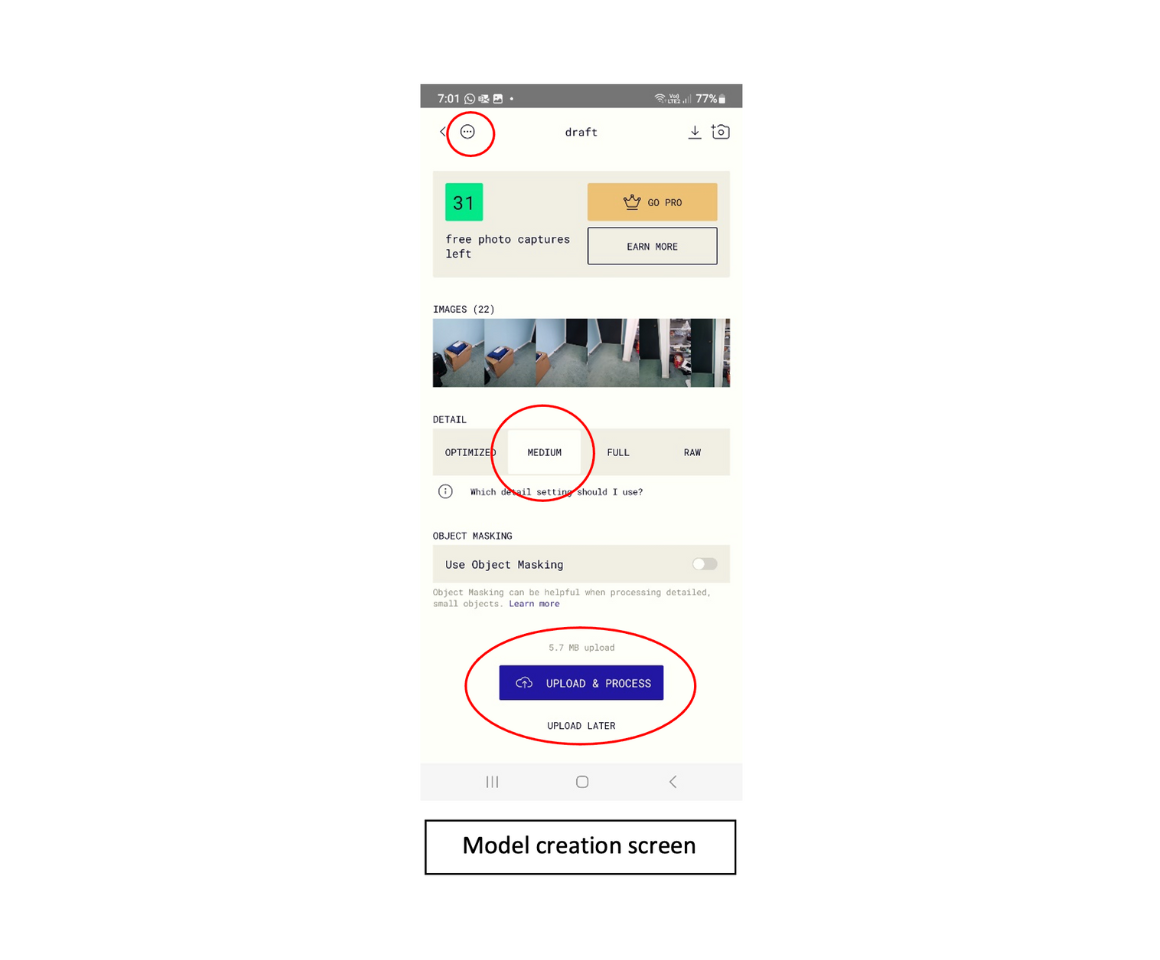
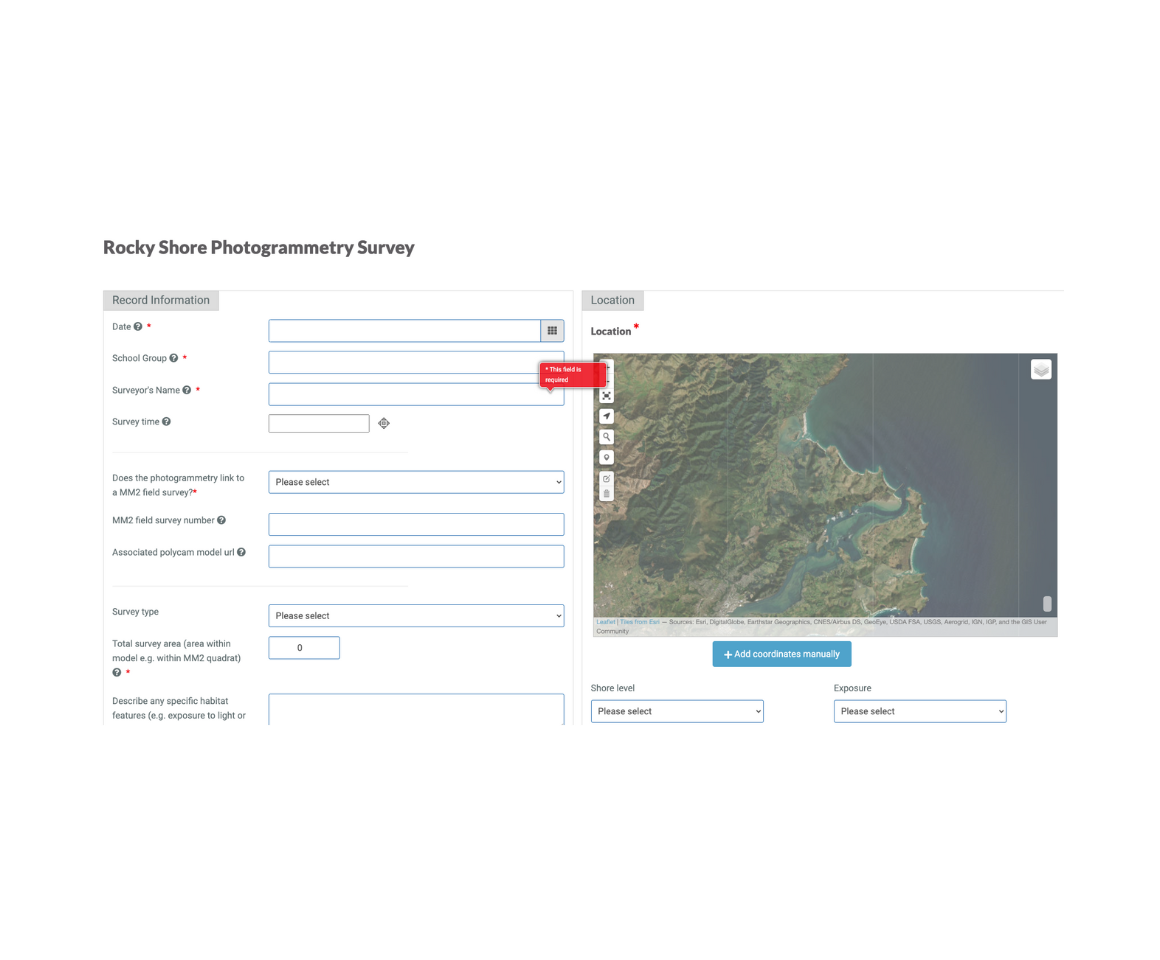
Photogrammetry works by capturing a series of overlapping 2D photos in the Polycam App. The app then stitches the photos together to create your 3D model. Once you have set up the app it only takes around 10 minutes to create your model.

Polycam App Store Screenshot
Step One

Download Polycam

The app is available for iPhone and Android devices.

Polycam is free, however it requires you to create an account and share your credit card details for a free 7-day trial of a paid subscription pack. However, if you cancel your subscription during the trial period you will not be charged (canceling immediately is advised).

Once the trial period is over you can use the free version of the app, the only limit is on the number of models you can create each month.

Google Play Store
Apple App Store
PolyCam Captures Screen
Step Two

Capture Images

Once you’ve finished your Marine Metre² survey, use Polycam to create your 3D model. It’s important to keep your quadrat in the same place!

Open the Polycam App. Go to the ‘Captures’ screen and ensure the Auto function is enabled so it will automatically capture images as the phone moves around the quadrat.

Press the capture button when you’re ready to start taking photos.

Move slowly and steadily in a clockwise direction around the quadrat. Ensure that the camera continues facing the quadrat as you move and captures all areas of the quadrat, including the quadrat boundaries itself and a small margin around the outside.

Press the stop capture button when you return to your starting position.

If you’re doing this with a class download our guide on how to run this session with a group.

PolyCam- Creating a 3D Model
Step Three

Create a 3D Model

Press Done once you have completed capturing the photos.

Polycam requires a minimum of 20 images, if you haven’t captured enough take a few extra of the quadrat from different angles (these could be overview shots capturing the whole quadrat).

Review your images
and delete any that were taken by mistake or are very blurry.

Name your model by tapping on the three dots in the top left of the screen. It’s a good idea to name your model the same as your Marine Metre² survey name/number.

Select Medium for model detail (or full if using a paid version of the app).

Leave object masking off (you can always reprocess later with this turned on to see if the model results improve).

Upload your model – If you have mobile data coverage on your phone, you can upload and process now; or you can press upload later if you would prefer to upload once you are back in WiFi coverage. If you choose to upload later the imagery will be saved as a draft. Tapping the draft on the ‘my captures’ screen will take you back to the model creation screen where you can choose to upload and process the model.

PolyCam - View your model
Step Four

View Your 3D Model

Once processed you will be able to view your model via the ‘my captures’ screen on your phone or a computer via the Polycam website.

You can your model by zooming in and out using your fingers (if touch screen), a mouse or the rotate tool. You can also check the scale of your model using the ‘ruler’ tool found in the ‘Measure’ menu.

Your quadrat will help you confirm the scale of your model as each side should be 1m long. If the scale is off you can click edit and update the value to rescale. Once updated, sync your changes so they’re visible in all versions of your model.


Photogrammetry Info
Step Five

Share Your Model

Collect data and share your 3D model here.

Some questions that you may like to explore:

Does your quadrat contain any distinct zonation patterns? If so what species make up the zonation and what is the width of each distinct zone?

How accurate were your estimates of encrusting animal and algae cover? Use the Polycam area tool to calculate the total area of each encrusting animal and algae species you identified and compare this to what you recorded in the field.