WHAT YOU’LL NEED
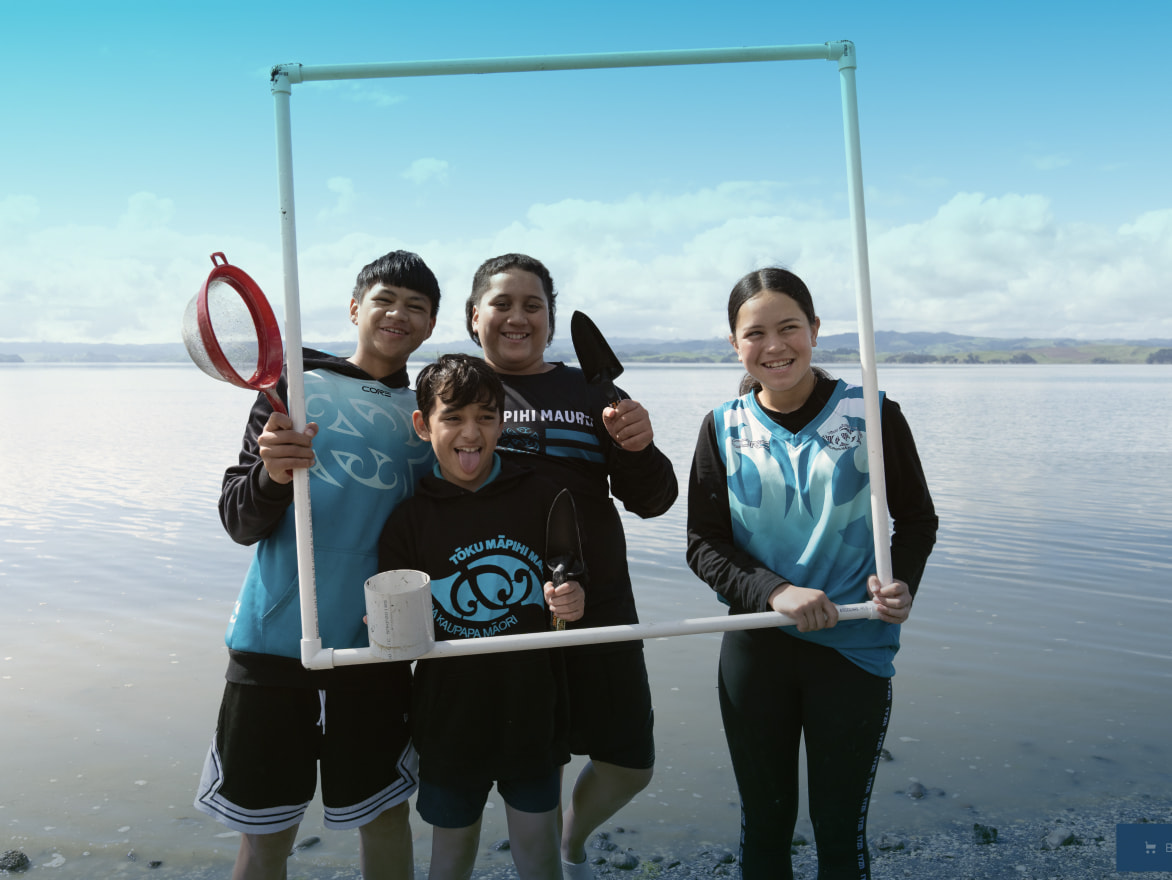
- A 1m x 1m square quadrat (see instructions below on how to make one)
- A 10 cm x 10 cm quadrat (1% of your m2) – a ice cream container lid is very useful! Find out how to make one here.
- A 10 cm diameter core (e.g. a large fruit can 10 cm in diameter and approx.. 11.5 cm tall is ideal or a pipe or plastic container this size.)
- A small trowel, a kitchen sieve and a bucket.
- A small ruler, a hand lens and a camera are also useful.
- A print out of this data sheet and a pen or mobile access to load your survey data online here
1. PLAN YOUR TRIP TO THE SHORE OR ESTUARY AT LOW TIDE
Tide times can be found by looking in the weather information section of a newspaper, or at metservice.com/marine/tides/index. The tide levels change each day and often are lowest around the time of the new or full moon so you may not be able to find the same low shore level next time.
2. CHOOSE YOUR MARINE METRE²
If you arrive at low tide, lay your square down near the sea. Record the shore level on the data sheet by ticking “Low”. If you want to put your square in the mid shore or high shore, then tick this instead. The top of the intertidal seashore is close to the seaweed drift line from the last high tide. To help you find your metre squared again draw a simple map, look for and photograph/record features that could help you on your next visit.
3. TAKE A PHOTO
Take a photo of your m2 area with the top of your datasheet in the corner so that you can compare the features of your sample area with others.
4. RECORD YOUR SURVEY SITE INFORMATION
- Record the shore level on the datasheet or online here using your phone or tablet.
- Take a photo of your metre square with the top of your datasheet in the corner so that you can compare the features of your sample area with others.
- Describe the location of the site, (e.g. name of the beach or a local landmark). This can also be done using a GPS function on your phone.
- Record the start time of your survey.
- Record key features of the site, (e.g. presence of a freshwater stream, evidence of human influences).
- Fill in as much information as possible before heading to the shore.
5. RECORD THE TYPE OF GROUND SURFACE (SUBSTRATE) IN YOUR SQUARE (E.G. REEF, BOULDER, ETC.) IN PERCENTAGES
This should add up to 100 %. If sand is layered on top of the reef – record the upper surface (in this case sand). Remember you can use your 10 cm² quadrat (1% of your m2) to help figure out the cover of the substrate.
6. LOOK FOR EVIDENCE OF WHAT LIVES IN YOUR SQUARE
- You may find holes (borrow openings), worm deposits (faecal casts). Record these on your sheet.
-
Measure the abundance of seaweeds using percentage cover. This is the percentage of the square that is covered by the seaweed when looking down. You can use your 10 cm² quadrat to help you.
- Start in one corner of your square and count the animals that you can see without moving any rocks or seaweed. Some small animals like barnacles can be found in very large numbers and it may not be possible to count all of these animals accurately inside your square. You can do a rough count in a small part of your square and scale this up using your 10cm² quadrat).
- Look for hidden animals on and under seaweeds, inside rocky crevices, and beneath small boulders. If you turn rocks over remember to return them gently to their original position. Do not lift rocks that are larger than your head.
- If you find a species you cannot identify, write a description of it in the species list. If you can, take a photo of it with a ruler (if possible) in the shot to indicate its size. Write a brief description of where it was found and what is was doing. Email this information to marinemetresquared@gmail.com to help others to identify it later.
7. TAKE CORE SAMPLES
- Starting in one corner, push in the core to a depth of 10cm and use your trowel to dig it out.
- If the sediment core remains intact, first measure and record where the RPD layer starts (from the surface). This is to see what lives just under the sediment and to measure the Redox Potential Discontinuity (RPD) level where oxygenated substrates (light brown) change to deoxygenated substrates (dark and often smelly) as this influences what lives where in the soft sediment.
- Next, place the sample in the sieve and pour water through it to wash off the sand and mud. Count and record the different species. Repeat in the other 3 corners of the square (so you have 4 core samples in total – one for each corner!)
7. CAPTURE A 3D MODEL OF YOUR SURVEY SITE
If you’d like to capture a 3D model of your site so you and others can revisit it later, you can do a quick photogrammetry survey using your phone. Once you’ve downloaded the app it only takes around 10 minutes. Find out how here.
8. SHARE YOUR FINDINGS
Load your findings into the Marine Metre² Database.